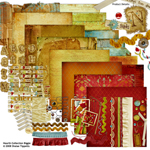
 I thought I'd share a tutorial with you that was featured in ScrapGirls' newsletter today.
Note: Tutorial created using Adobe Photoshop Elements 7.0 with Windows XP.I love the look of creating dimension with my digital scrapbooking layouts. I’m always looking for ways to create the look of realistic texture within the embellishments and papers in my digital layouts. Today, I’m going to show you how to create the look of peeled paint.
Open one of the ScrapSimple Paper Templates: Peeled Paint 1 in your program.

Open one of the papers from Fall Watercolors Collection Mini. I like to use this set of papers because they already have the blending and textures of bleeding paint, which will work well with the peeled paint templates.

Drag your watercolor paper below the peeled paint layer on your Layers Palette.

Make sure your watercolor paper is selected. Right-click on the layer and select “Duplicate Layer.”

You now need to move the duplicated layer above your peeled paint layer on your Layers Palette. Click on the eye on the bottom watercolor paper so that it is not visible in your window.

Select the top watercolor layer. You need to create a clipping mask with the peeled paint layer. To do this, hit Ctrl+G (Alt+Ctrl+G for Photoshop) while your watercolor paper is selected. You will see it become indented with an arrow pointing to the peeled paint layer below it. You will also see the watercolor paper take on the shape of the peeled paint layer in your window.

You now are going to change the Blend Mode of the watercolor paper by selecting the drop-down menu at the top of the Layers Palette that shows “Normal” in the window. Once the drop-down menu comes up, select “Linear Burn” and watch how your watercolor paper takes on the depth, texture and dimension of the peeled paint layer below it.
If you are working with different papers than I am demonstrating with, you might need to go through the various Blend Modes to find the effect that looks the most colorful and realistic to you.


 |  |  |
 |  |  |
Commercial license versions of ScrapSimple Paper Templates: Peeled Paint 1 are also available. | ||

4 comments:
Very cool! Thanks for posting this here also!
LOVE this look! :)
I am always grateful for people to show step by step how to do these kinds of things. The effects look great and the finished product is very inspiring (and your baby is cute, too!)
Only one thing kind of spoils it for me: You have spelling mistakes in your journaling. You have the word "your" where it should be spelled "you're". Maybe it's just the teacher in me that notices these small errors, and I'm sure it's not a big deal to fix, but keepsakes as precious as this deserve accurate spelling!
Cindy
Thanks Cindy - that is definitely a huge weakness for me, and it helps when I totally overlook things for others to point it out. It's my husbands major job around here. :) Where was he for this one! LOL
Post a Comment