 This tutorial is created in Adobe CS2 on WindowsXP
I have had people ask me how I get my photos so bright and colorful. The method I use is quite simple really. In fact if your a professional photographer you would probably roll your eyes, knowing that there are MUCH better ways of doing this. Until I learn those other ways, this is a simple method for me and it works great.
 Open your photo that you wish to correct. I chose this photo because there are a lot of things wrong with it. There is a bad back light which is really bright, making Mirian and everything else around her darker. I want this picture to be lighter and brighter, without making those bright backlights worse.
 In the tool bar at the top of Photoshop go to Image > Adjustments > Levels. This will be found in a different spot if you use Photoshop Elements. It's under Enhance> Adjust Lighting> Levels. (PSE 3.0) It should be similar in all versions. (Thanks Julie for your help on that!)
 You will then see the Levels options. The black mountain diagram will look different based on your photograph.
You will notice that there are three little triangles below the diagram. One which is black for the dark areas and shadows of your picture. One that is grey for the mid tone areas of your picture, and a white one for your light area of the picture. If you click on one of them you can slide it back or forth to adjust that specific area for your picture.
 Here is an example of what happens when I slide the white slider to the left. Suddenly the background gets more washed out.
 Here is an example of what happens when I move my black slider towards the right. Suddenly the whole picture got very dark.
 This picture shows what happens when I move the mid tone slider to the left slightly. It brightens up Mirian's face and body, but does not wash out the image. If I were to move it to the right it would darken her up more.
I always start the with the mid tone slider first. I slide it back and forth until I find a nice straight brightness across the board. Something that isn't too bright, or too dark, leaving all of the features still looking normal. You might have to adjust it a lot or just slightly.
 After I adjust my mid tones I will then adjust the dark slider to make the image pop out. Then I'll adjust the white slider if I need to make any light areas slightly brighter. That is the best order to work in. Mid tones first, and then Shadows and Highlights second.
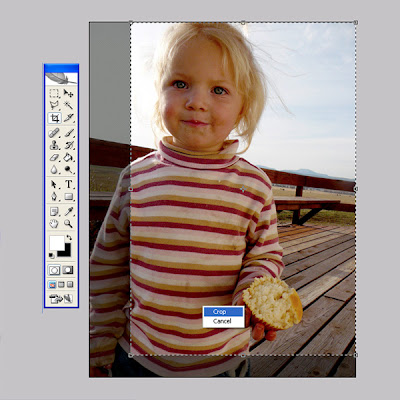
Once I have it adjusted how I would like, then I hit ok. I usually always crop my photo in some way. Especially if I'm wanting a portrait shot of a person. Here I cropped the picture of Mirian by cutting off some of that really bright back light to the left. It also gives it a better composition using the rule of thirds. (That's another tutorial.)


2 comments:
This is fantastic Shalae!!! You make it so easy to understand:)
Hi, Shalae. I use PSE3, and I LOVE to use my levels slider to fix less-than-perfect pictures. To answer your question, the steps are as follows: Enhance > Adjust Lighting > Levels. Hope this helps!
Post a Comment